Last week we posted Aroon Kalandy’s Showcase, and we got tremendous response from users and they asked me secret behind those snaps. I mailed to Aroon and ask tips for his Macro Photography shots, he immediately responded and sent these tips to me. Thanks a lot Aroon for your quick response.
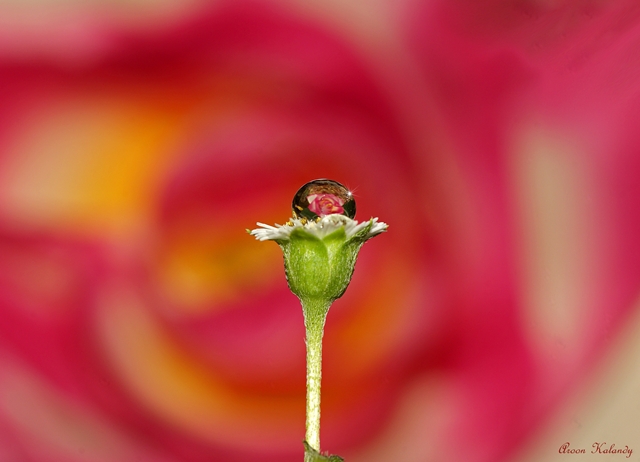
15 Tips to take Water Drops with refractions in them
Macro Photography is fun. I turned to macros when I got my Tamron 90mm which gives a magnitude of 1:1 Macro Photography is close-up photography, usually of very small subjects. Many lens are there in the market with 1:1 ratio, even 5:1 ratio as the case is with Canon MP-E 65mm 1-5x Macro Lens.
I normally use Tamron 90mm for my Macro work. I explored the world of tiny wonders when I got my Tamron 90mm. It give 1:1 ratio and is one of the best in its Class. Water drop with refractions are normally seen on flowers and Leaves. But one can use anything, from needles to wires and pencils to obtain breath taking images. A small exquisite water drop is a world on its own. For taking water drops I use inexpensive materials like Syringe, Pins, Thermocol sheet, wires, etc.
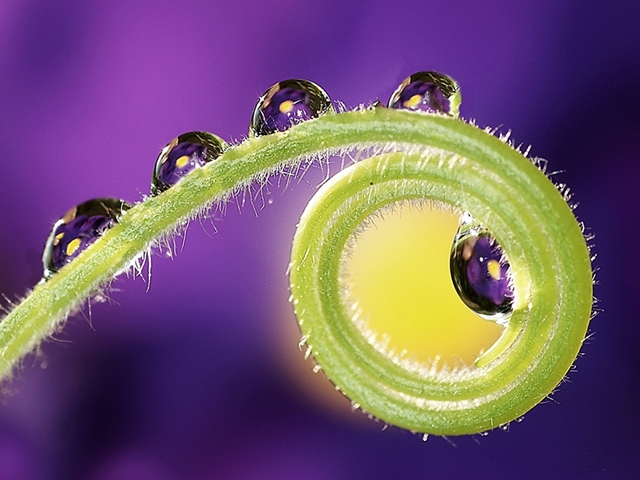
I am sharing some ideas, how to take Water drops macros with refractions.
- A macro lens is must. (I am using Tamron 90mm)
- A natural drop on a Flower or a drop placed by a Syringe.
- An additional Flower can be placed some 3 to 5 inches behind the drops.
- A syringe with the needle removed is very useful for placing the drops on the flowers or other surfaces.
- Add a bit of sugar to the water. The drops will attach itself more firmly even on slippery surface.
- Use Aperture Priority in your DSLR.
- Any Aperture from f 11 to 20 is useful for getting even sharpness ( So I like to take these kind of images in Sunlight or bright shade.)
- If taken in sunlit conditions you might get a flare on the drops which adds to the beauty.
- If you use F2.8 etc, you get sort of Dreamy Images where the focus will be on a small area and you get a great bokeh.
- Use tripod if necessary especially if you are taking images at F2.8 or so.
- Don’t get too close to the drop or the lower part will be darkened.
- Take these images on windless days hence either the flower in the background or the drop falls off.
- Make sure that the whole flower is reflected in the drops (You may have to move this way and that for that!!)
- Materials like Thermocol etc come in useful for pinning flowers or reflecting light.
- If you are taking more than one drop at a time Stacking helps. Or you may have to use Aperture from F9 to F20 to get all round sharpness.
I do hope this helps…. You can of course use different colored Flowers for effect. Drops on Feathers and such lovely objects taken without refractions are also beautiful.
You can find Aroon on the Web :
Flickr : www.flickr.com/photos/14772419@N04
Redbubble : www.redbubble.com/people/AroonKalandy
Imagekind : Aroon Kalandy




9 comments
Thanks a lot for awesome tips.
My recommendation is to stick under f16. If you go beyond f16, you run into diffraction, which tends to reduce image sharpness
Very nice tips Aroon.
My pleasure Dear friends…..
I wish you Happy clicking……
great effort and thanks to arvind balaraman
great work….and appreciative that u r sharing the tips….It’s inspiring….
Excellent work!
I tried few but not so clear http://www.myclicksstory.com
Thanks,
AnAnD
Thank you for the great tips aroon..
How did you get the water droplet to stay on top of the the stem. I am trying to duplicate the first picture and using glycerin and water with an eyedropper.
Thanks for your help.
Beautiful picture